 Here's a close-up. I machine quilted loopty-loops in the red areas and on the sashing and straight line 1/4" outline style quilting on the strings.
 All folded up and ready to go to its new home...DS's apartment!
 Here's a close-up of the Knife Edge finish I used....I didn't want a black binding and I had no red fabric left so I decided to finish the quilt this way. Its a technique I learned from an unknown quilter...the quilter that made my vintage red and yellow tumbling blocks quilt and I thought I'd share with you how I did it.
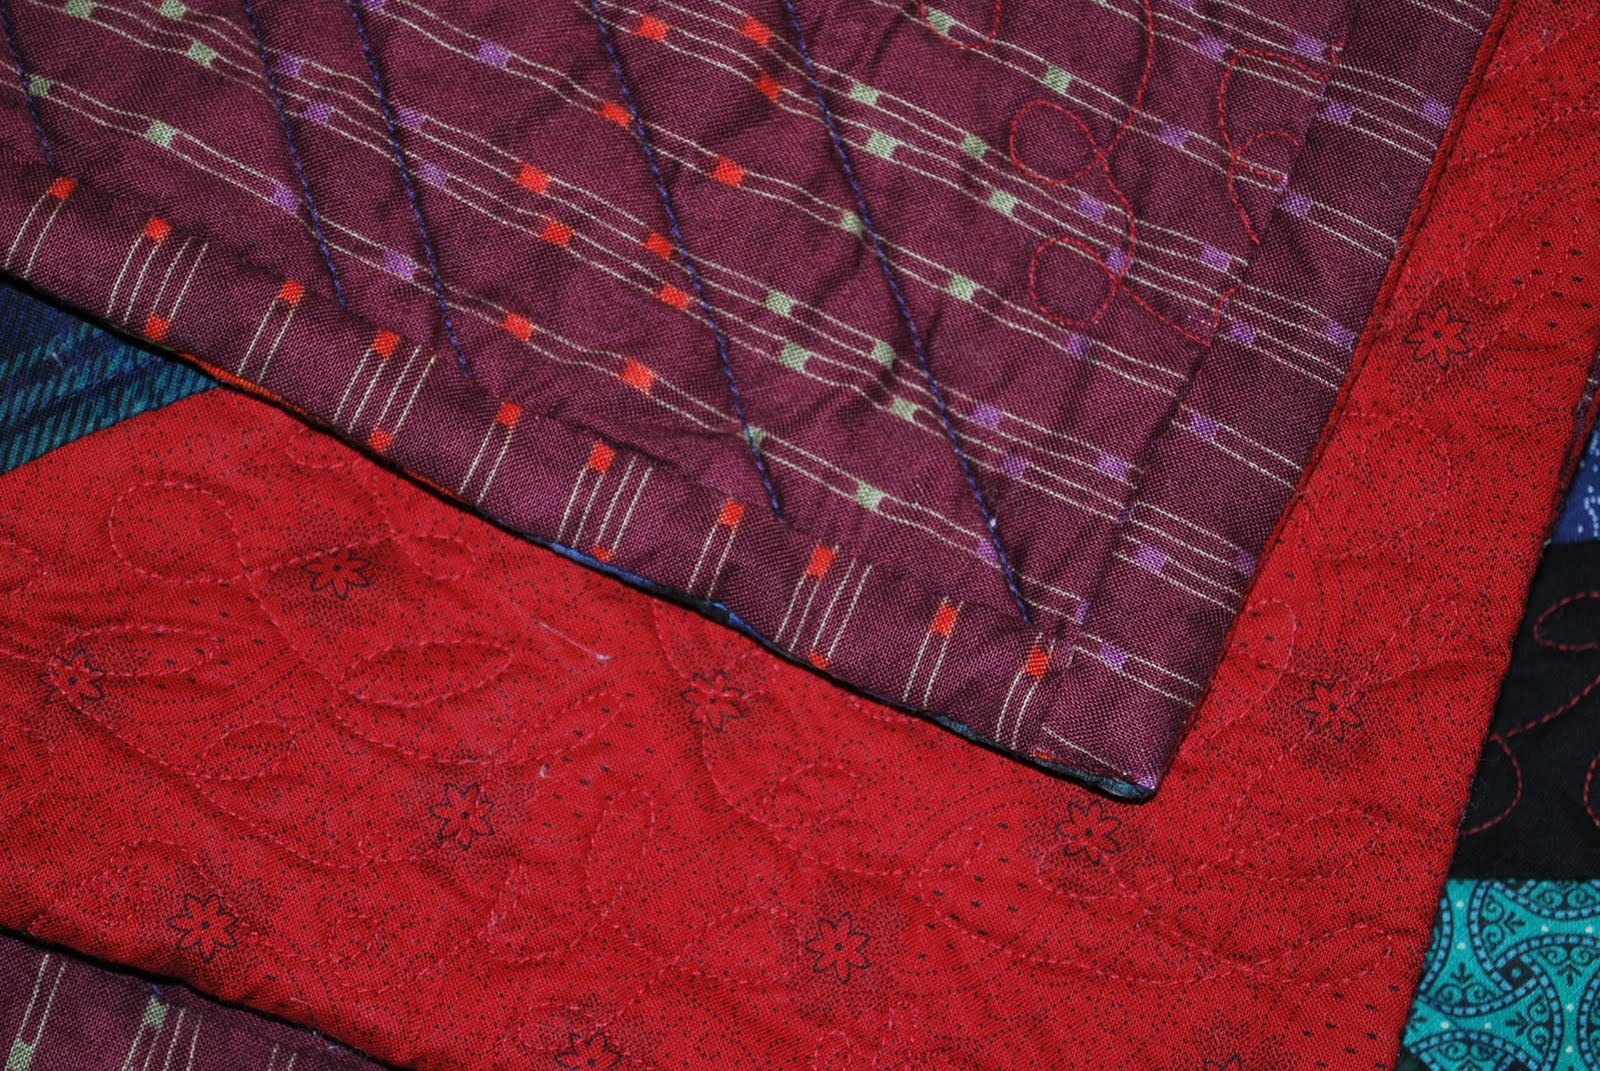 Putting on this binding is like adding another border to a quilt...it is not a continuous binding.
I prepared my binding strips for the top and bottom of the quilt exactly the same way I would a border-only its a 1" border!
 You can see the binding pinned onto the quilt...notice the pressed down edge-I pressed 1/4" of the long edge of the binding strip for ease when sewing it to the back.
 Binding machine sewed on with a 1/4" seam.
 I then pulled the entire binding to the back (including the seam allowance-the whole thing!) and pinned.
 Here you can see how it looks from the front as I pulled the binding to the back and pinned. Once completely pinned, I sewed the top and bottom bindings to the back of the quilt by hand-the whole idea is that nothing shows on the front so you kind of have to sew the binding to the back by hand.
 Now for the side bindings. They're almost exactly the same...the exception is that I cut them 1/2" longer than I would have if they really were a border for the quilt so I could fold under 1/4" of the short sides. This way there will be no raw edges when I finish the binding.
 Next I pinned the side binding on....you can see that the top binding is completely finished and I've aligned the short folded edge of the new binding to the finished edge of the quilt.
 View of side binding sewn on from the front of the quilt...
 View of side binding sewn on from the back of the quilt. (See how I sewed over the finished binding.)
 I then pulled the side bindings completely to the back, pinned and sewed by hand...and that's it-a machine sewn (well, mostly) knife edge finish!
While not my regular binding choice, I have used this on other quilts when it just seemed the perfect finish.
This is my second finish for the String Quilt Challenge and my first finish for the Spring to Finish Challenge 2010.
I'm also linking to Finished for Friday and Sew and Tell. Hop on over and see all the wonderful finishes!


32 comments:
I have never seen a binding like this before. Thank you for the tutorial!
And congratulations on the beautiful finish for all the challenges you mentioned.
Congratulations on your finish. It's very handsome. Wow a tutorial too. Thank you for sharing.
I have not seen it done like this. The quilt is wonderful - I love the colors used, your son will love it.
Karen
http://karensquilting.com/blog/
Oh my goodness! You sew so beautifully! Thanks so much for visiting my blog. I love to have company!
Wow! I love this... Never thought of making a string quilt like that- great job! :)
BTW - I'm hosting a Wonky Quilting Bee on flickr if you are interested. Details are here: http://www.flickr.com/groups/sewbeewonky/
:D
Your quilts are so beautiful, congrats on finishing this one. The colors are so vivid. Thanks for your visit yesterday. Have a wonderful holiday.
What amazing detail - well done! :)
Your quilt turned out SO pretty and thank you for sharing the how-to for the knife edge finish.
The quilt turned out great. I haven't seen a quilt finished like this before. Thanks for sharing the steps. I will have to give it a try.
Simply stunning. Seriously stunning!
That is a gorgeous quilt. The contrast and rich colors are so effective.
Thanks for teaching me a new edge. I like the look of it on this quilt. And the color is stunning. What a great quilt for your son.
Wow! That is really beautiful! I love the colors and the neat pattern in the quilt. You did an excellent job! Thanks so much for sharing.
Oh my gosh, what a striking, beautiful string quilt! I am pressed for time at the moment, but I'll be back to read about that knife edge binding in all the detail later.
Hi Miri,
Thank you for visiting me and leaving the kind comment. It's thrilling to meet a fellow home machine quilter.
Your finished quilt is lovely, and that binding is most interesting.
Wonderful quilt! I haven't seen a binding like this before. Thanks for sharing!
What a great little tutorial, thanks!
It's beautiful!
Wow, this is the most striking string quilt that I have ever seen.
I found you through your comment on "Teeny tiny quilts" blog, and just had to see your quilt.
I AM NOT disappointed !
Very interesting finish, too. I've been quilting for over 20 years and have never seen or tried this one. Thanks for teaching me something new !
This is gorgeous!!! Thanks so much for commenting on my blog www.BudgetBlonde.com! I hope you come back soon!
Beautiful quilt! i love the solid halves contrasting with the string piecing.
Thank you so much for the excellent directions on the Knife edge!!
Wonderful finish too :)
Your sons quilt turned out beautifully! Thanks for teaching us about the knife edge binding. I had never seen that technique before.
Your quilt is so pretty, I like the color and the way you put the blocs together. Beautiful.
Thanks for the tutorial, I always love learning new techniques. This is very interesting. Thanks so much for linking up to Finished for Friday!
Hello Miri, something about making string blocks....love the quilt you have made...and thank you for sharing the Knife edge binding...Regards Lyn
I adore your strings quilt I think I have to put it on my very long list it is beautiful & your DS should love it-if he doesn't there are people lined up who do,lol!
Very stunning with the sashing!!
Your quilt is beautiful and thanks for the tutorial!
Micki
This is beautiful! I am sure DS will treasure it. I bookmarked the tutorial on the binding as I am sure it will come in handy for just the right project some day.
Wow, I really love this string quilt! And thanks for the tute on the Knife Edge binding ... I just learned something new! It' great and I think I'll be using it. BTW, thanks for visiting me from Sew and Tell Friday and leaving a comment! Love the company, too!
Post a Comment