Showing posts with label String quilt challenge. Show all posts

Tuesday, June 29, 2010

No Strings Attached Challenge Finish Report


Today is the day to report on my finishes for The No Strings Attached Challenge from Loft Creations.

I haven't made as many string projects as I have string projects in my head! LOL! and some of them I really like and hope to actually see in fabric. I recently made some potholders...I'm still working out the dimensions. I seem to make them either too big and too thin or too small and too thick but they are cute!
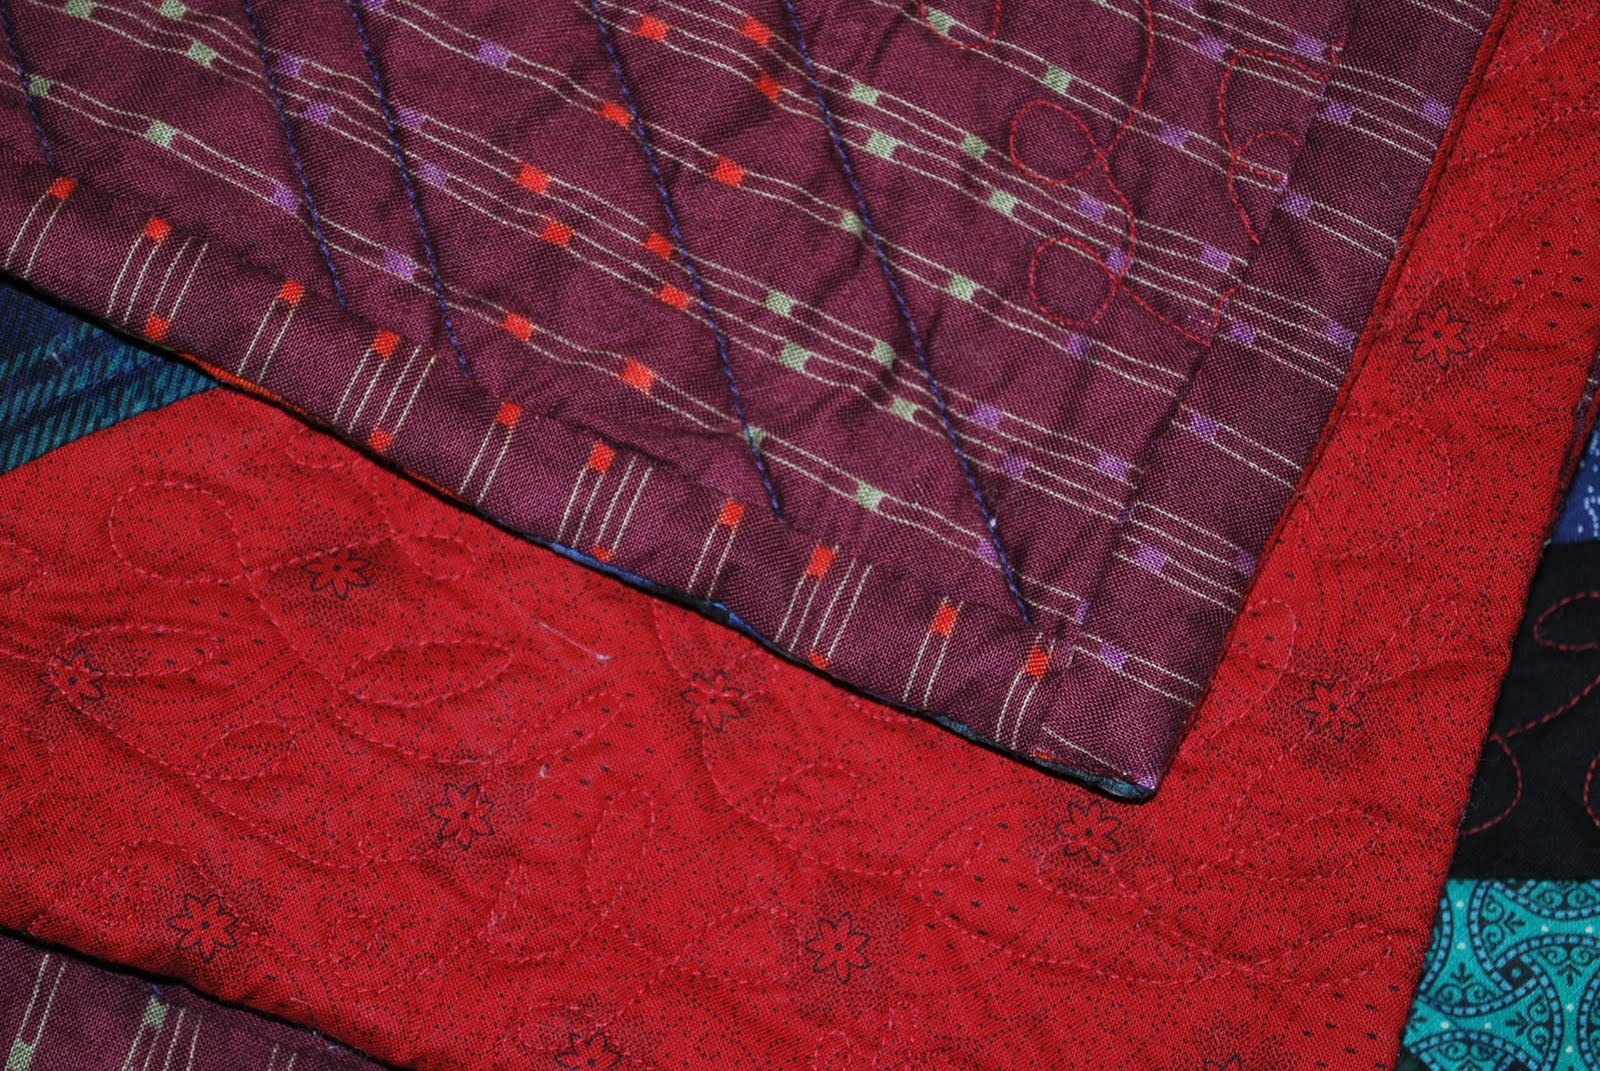
Here's the full size quilt I made for DS...my really big string project...
and the string pillow that has quickly become a family favorite.
Lots of great finishes so check them out on the side bar at Loft Creations.

Thursday, May 27, 2010

String Quilt Finished with Knife Edge Binding

Tada! Finally, my string quilt full size quilt is finished and I love it...and more importantly so does DS!Here's a close-up. I machine quilted loopty-loops in the red areas and on the sashing and straight line 1/4" outline style quilting on the strings.
All folded up and ready to go to its new home...DS's apartment!
Here's a close-up of the Knife Edge finish I used....I didn't want a black binding and I had no red fabric left so I decided to finish the quilt this way. Its a technique I learned from an unknown quilter...the quilter that made my vintage red and yellow tumbling blocks quilt and I thought I'd share with you how I did it.
Putting on this binding is like adding another border to a quilt...it is not a continuous binding.
I prepared my binding strips for the top and bottom of the quilt exactly the same way I would a border-only its a 1" border!

You can see the binding pinned onto the quilt...notice the pressed down edge-I pressed 1/4" of the long edge of the binding strip for ease when sewing it to the back.
Binding machine sewed on with a 1/4" seam.

I then pulled the entire binding to the back (including the seam allowance-the whole thing!) and pinned.
Here you can see how it looks from the front as I pulled the binding to the back and pinned. Once completely pinned, I sewed the top and bottom bindings to the back of the quilt by hand-the whole idea is that nothing shows on the front so you kind of have to sew the binding to the back by hand.

Now for the side bindings. They're almost exactly the same...the exception is that I cut them 1/2" longer than I would have if they really were a border for the quilt so I could fold under 1/4" of the short sides. This way there will be no raw edges when I finish the binding.
Next I pinned the side binding on....you can see that the top binding is completely finished and I've aligned the short folded edge of the new binding to the finished edge of the quilt.
View of side binding sewn on from the front of the quilt...
View of side binding sewn on from the back of the quilt. (See how I sewed over the finished binding.)
I then pulled the side bindings completely to the back, pinned and sewed by hand...and that's it-a machine sewn (well, mostly) knife edge finish!

While not my regular binding choice, I have used this on other quilts when it just seemed the perfect finish.

This is my second finish for the String Quilt Challenge and my first finish for the Spring to Finish Challenge 2010.

I'm also linking to Finished for Friday and Sew and Tell. Hop on over and see all the wonderful finishes!

Friday, May 14, 2010

Two Pillows Finished!

I finally finished up these two pillows. This first one, a string quilt project for the String Quilt Challenge at Loft Creations, was delayed by my never finding the time to finish up the embroidery but at last its done-before Spring is over!This punchneedle (the design is from a vintage Pennsylvania quilt) has been waiting even longer to be finished...about a year! I like the cute little plaid ruffle. This looks great on a dark wood chair and also on the new slipcovers on our sofa.
I'm linking today to Finished for Friday at Lit and Laundry and to Sew and Tell at Amy Lou Who. Stop on by both and see the wonderful projects finished this week!

Saturday, April 17, 2010

String Quilt Surprise

Remember these? I couldn't decide which setting I liked best and judging by your comments, neither could alot of you. Well, I decided to let my son decide, since it will be his quilt. Which did he choose? He looked and looked and he couldn't decide either. Then he said, "Wait a minute.


What if we turn this one like this, and this one like this..."

And there you have it! Straight furrows! I hadn't even thought of this setting. Mind you, this is the child who grew up with a quilting Mom-seems something rubbed off!

One of things I like about this string quilt block is that you can use it with any log cabin/half square triangle setting...you just have to remember them all!

The top is all sewn together-great to get back into the sewing room-now it just needs to be quilted. I'm hoping to baste it up this week and get started.

Thanks everyone for your help!

Tuesday, January 19, 2010

Sunlight and Shadow quilt: String quilt style

I've been fooling around with this Sunshine and Shadow block for a while now. Here,
and here. Both of these are foundation pieced with equal width strips...
but now I'm doing them String pieced! Oh how liberating....how quick and easy...and a great way to use up scraps-lots and lots of scraps! Finally!

Remember what my ironing board looked like last week...well, this is it today. 42 blocks-all sewn with just some trimming left to do!
I love this! I love this so much I have joined Stephanie String Quilt Challenge so this will be just the first String quilt this year! Yes!

To see what other String Quilt- bitten- by- the- bug quilters are up to check out the list on Loft Creations side bar ( visit anytime using the button on my sidebar :).

Here's a quick peak at three finished, trimmed blocks!
The start of a fun, fun scrap quilt!