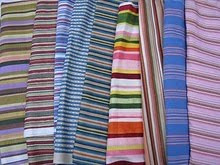
DH was going through his closet finally-moving winter stuff out and tossing some ratty old turtlenecks and long sleeve T-shirts. I looked at the pile and thought...hmm, grocery shopping bags?
These have to be the easiest bags ever! Sorry I didn't think to take pictures but here's what I did. I simply turned the shirt inside out, cut with my rotary cutter just below the sleeves, pinned and sewed with an overlock stitch the bottom seam of the bag. (If I had been using my old machine, I just would have sewed the seam and then zigzagged on the cut edge.) Body of the bag-finished..you can see on this pix how nice the top of the bag is finished-that's because its the bottom of the shirt! LOL!
 Then I cut a strip from a different shirt (one in even worse shape!-how does he get those holes?) for the handles...one strip was enough for both handles. I cut off the seams and had my two handles. I ironed on iron-on interfacing so there wouldn't be too much stretch in the handles, folded the cut edges in towards the center, folded it all in half lengthwise and sewed right on the edge of the double fold. Added the handles to the bag body and that was it! A finished grocery bag!
 Then I cut a strip from a different shirt (one in even worse shape!-how does he get those holes?) for the handles...one strip was enough for both handles. I cut off the seams and had my two handles. I ironed on iron-on interfacing so there wouldn't be too much stretch in the handles, folded the cut edges in towards the center, folded it all in half lengthwise and sewed right on the edge of the double fold. Added the handles to the bag body and that was it! A finished grocery bag!
DH is a pretty big guy so all the shirts were either Large or X-large...this bag came out huge. I'm not sure how well it will work as a grocery bag (it may be too big!) but it's great for holding all the other grocery bags!
 I'm linking to Finished for Friday at Lit and Laundry, Sew and Tell at Amylouwho and Frugal Friday at the Shabby Nest. Hop on over there and see the terrific finishes for this week...lots more interesting stuff than grocery bags I'm sure!
 I'm linking to Finished for Friday at Lit and Laundry, Sew and Tell at Amylouwho and Frugal Friday at the Shabby Nest. Hop on over there and see the terrific finishes for this week...lots more interesting stuff than grocery bags I'm sure!